Lesson 1 of a new topic is always nervy, especially when you haven’t actually run it with a group before. I am really lucky to have a massively considerate group of year 9s who roll with the ups and downs of some of our coding experiments and who have learnt to just give things a go.
Not everything will work perfectly, failure is actually an option and we are learning from our mistakes.They are also learning that things will go wrong when you code and to dust themselves off and attack it again until it works.
I’ve linked my lesson 1 powerpoint at the end of this post for anyone who wants to use it.
The first thing to do in lesson 1 is to provide each group with a Rasberry Pi (in a class of 25, I’d have no more than 4 in a group – 2s and 3s is preferable, but it depends on the availability of the pi). The first part of the lesson looks at hardware – the group is given 5 minutes to plug their Pi in and have it booted to the desktop.
After this, if you are feeling brave, you could task them with installing Minecraft using the instructions in my Setting Up Minecraft post. Alternatively, you could set these up prior to the lesson.
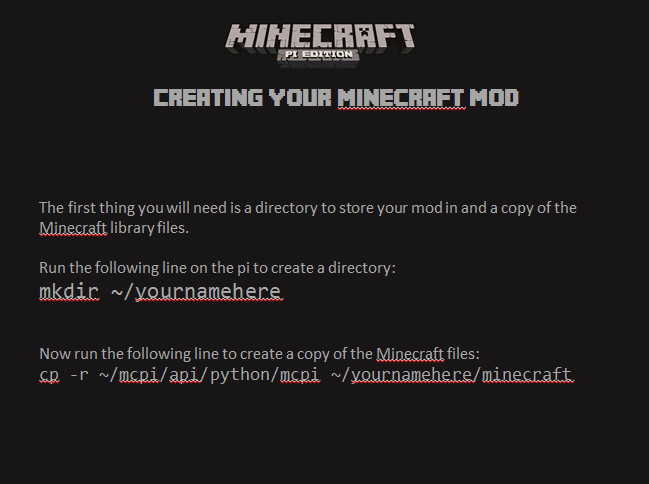
Once ready, the kids should then set up an individual folder on the Pi for their files (it is useful to have them back the whole folder up onto a memory stick which prevents them from being tied to ‘thier Pi’).

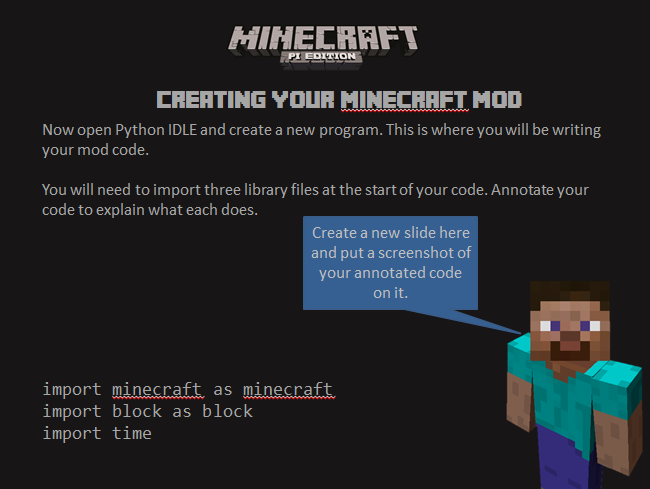
The following slides will guide them through the creation process. To ensure that this is not all practical work, set them the task within their team of recording what they are doing (including annotating their code and writing up their progress – this could include taking photos of what they are doing and adding these to their powerpoint)

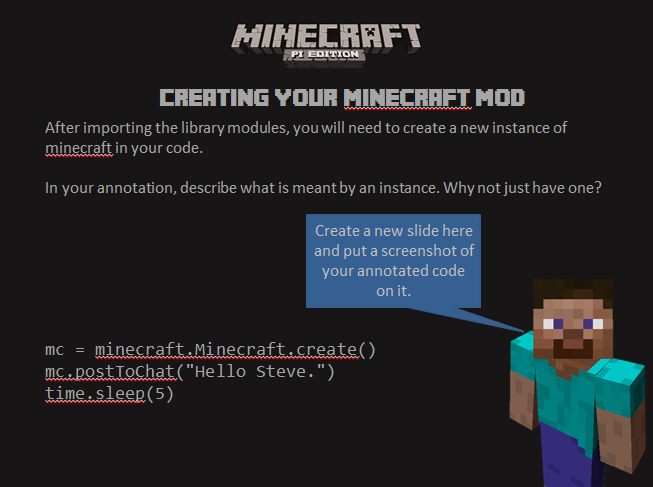
This is now a great time to get them to pause and consider what an ‘instance’ is. Possibly take it out of context and get them to describe a student
- What ‘attributes’ does a student have? Write these down on the board (A class is a template of an object / instance)
- Now ask them to describe someone in the classroom just by using the attributes. (An instance is real – the attributes have values)

This is the crucial point where they will run their code and see it work in Minecraft. For some this will happen straight away, for others maybe not. It is possible to use these slides as ‘hinge’ moments in the lesson. You will know what progress they have made by what they are creating. The golden rule is they cannot move onto the next slide until they have shown they understand x.
Hinge 1 – Show an understanding of the term ‘instance’ (through their written explanation)
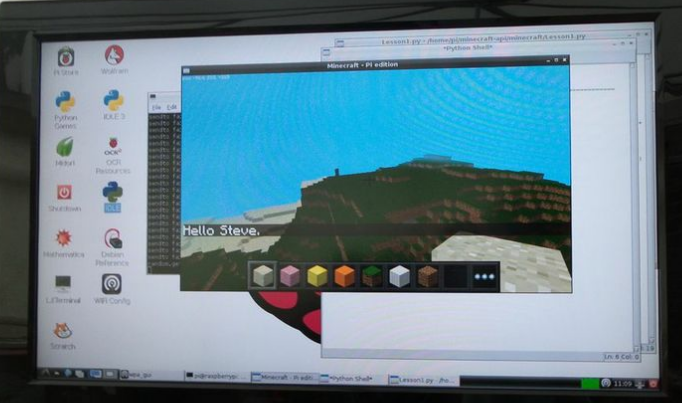
Hinge 2 – Provide evidence of working output code (screen capture / photo of minecraft message)
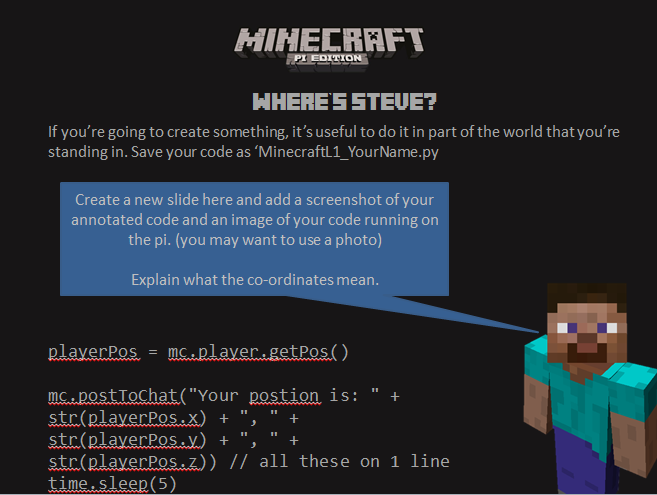
For some students, this will be enough to fill an hour as they will be adapting the output message to really get a grip on how the instance and chat screen actually works. Others may want to move forward and a good extension for this is to introduce co-ordinates in the world:
Hinge 3 – Show an understanding of the mathematical co-ordinates used within the 3D world
This piece of code picks up the x,y and z co-ordinates of ‘Steve’ the player and outputs them to the screen. Here, the students can move the player around and take a number of captures to see how the co-ordinates change based upon his current location. These can then be used to set up blocks in later lessons.

The final extension for this lesson is to create an instance of an actual block. This is the foundation of the game in creative mode and will provide them with the knowledge to build some impressive structures.
Here, a FOR loop is used to create a stack of 20 blocks.

If any of the groups get to this stage – ask them to check on their presentations. Are they detailed enough? Would they be able to use them if they were asked at random to present their work to the class, the year, the headteacher….. hint hint 😉
Computing – Minecraft – L1